

Have you ever finished a long ride only to realize your hips are numb, tingling, or downright sore? That sinking feeling of discomfort creeping in as your hips go numb while cycling is more common than many think. I remember the first time it happened to me—my legs were biking strong, but my hips felt like they were falling asleep. It was frustrating, and honestly, a little alarming. I had all the pasta and energy drinks, yet my hips betrayed me just when I needed them most. After some trial, error, and a few missteps, I finally cracked the code on bike seat adjustments that actually worked. And let me tell you, it made my rides not just longer but way more comfortable.
Why Most Bikers Are Missing the Mark When It Comes to Seat Comfort
The truth is, many cyclists face this issue because of one simple mistake: they overlook proper seat positioning. It’s tempting to just jump on your bike, clamp the saddle, and start pedaling, but little do most realize, a tiny shift in your seat height or angle can make a world of difference. If you’re like I was, you might have set your seat based on generic advice or what brands claim is ‘optimal.’ But that typically ignores your specific body mechanics and riding style. And here’s a shocker: according to a recent study, improper saddle height is the leading cause of nerve compression and numbness among cyclists. That means the numbness isn’t just annoying; it can lead to longer-term nerve issues if ignored.
Early on, I made the mistake of adjusting my seat to match a friend’s dimensions, assuming what worked for them would work for me. Spoiler: it didn’t. Instead, I ended up with pins and needles in my hips after every ride. It was only after I learned how to fine-tune my seat position based on my unique anatomy that I finally found relief. If you’re tired of the same old numbness and discomfort, stick around. We’re going to explore how to get your saddle just right so you can ride longer, feel better, and avoid those pesky hip tingles.
Is Seat Adjustment Really the Key to Ending Hip Numbness? Maybe You’re Skeptical
Honestly, I was too. I thought, “It’s just a seat; how much difference could it possibly make?” But misjudging the importance of proper fit was my first mistake. For years, I believed that more padding or a fancy saddle was the answer, but real relief came from adjusting the height, tilt, and fore-aft position. If you’re worried that fussing over your seat might be a wasted effort or too complicated, I get it. That’s a common hesitation, but trust me—from personal experience and talking with experts—I can assure you that small changes make a big impact. Want to learn how to find your perfect saddle position? Check out this comprehensive guide on mobility adjustments to optimize your posture and comfort during cycling.
Now that you’ve faced the problem, it’s time to understand the root causes and how the right seat setup can transform your ride. Ready to make your cycling experience pain-free and more enjoyable? Let’s dive into the practical steps that will get you there.
Position Your Saddle Precisely: The First Step to Comfort
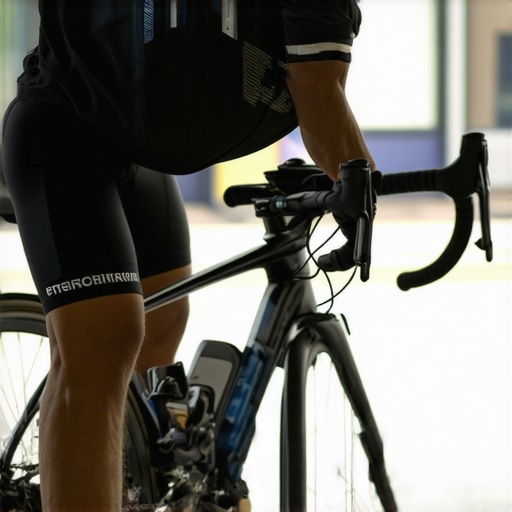
Start by setting your saddle height. Sit on your bike and place your heel on the pedal; pedal backward until your leg is fully extended at the bottom. The knee should be almost straight with your heel touching the pedal. This setup ensures your hips are level and not rocking, which can cause nerve compression and numbness. I remember struggling with persistent hip tingling until I followed this simple test, which dramatically improved my comfort during long rides. Avoid guessing—use a measuring tape or a smartphone app to be exact.
Adjust Your Saddle Tilt: Finding the Perfect Angle
The saddle tilt impacts pressure distribution. A level saddle is usually best, but slight adjustments can help. If you notice your hips shifting or you feel pressure on your groin, tilt the nose of the saddle slightly downward—about 1 to 2 degrees. Conversely, if you’re feeling pressure on your sit bones, a slight upward tilt might help. I had an awkward ride where I kept sliding forward until I realized my saddle was tilted too far forward. After dialing it back, my hips felt more stable and the numbness vanished.
Set Fore-Aft Position Correctly
This is about where your saddle sits relative to the handlebars. Sit on the bike and place your hands on the hoods. Without moving your feet, rotate your hips forward and backward to find a position where your knee is directly above the pedal’s axle in the 3 o’clock position, when viewed from the side. In my case, I once placed my saddle too far back, causing unnecessary hip strain and numbness. Moving it forward by a few centimeters made a significant difference, reducing pressure on nerves and improving circulation.
Optimize Your Cleat Placement
Align your cleats so they match your foot’s natural position. Slight inward or outward rotation can relieve internal hip tension or reduce numbness. Install your cleats and pedal gently to feel which position distributes pressure evenly. During my own adjustment, I noticed that a small inward rotation eliminated a persistent tingling in my hips. Remember, even tiny changes can lead to big comfort gains.
Test and Feel: Small Adjustments Matter
After each adjustment, take your bike for a short ride. Pay close attention to how your hips, pelvis, and nerve sensations feel. Keep notes if necessary. I once spent an entire afternoon tweaking my saddle position, which felt messy at first, but the relief I experienced was worth it. Consistent testing ensures you find that sweet spot where comfort and efficiency meet.
Integrate Mobility Routines to Support Your Setup
Enhance your seat adjustments by incorporating targeted mobility exercises. These routines can help release tight hips and pelvis muscles, making proper saddle positioning even more effective. For in-depth mobility strategies tailored to cycling discomfort, check out this guide. I personally started doing simple hip openers daily, which made my adjustments more impactful and long-lasting.
 Many people believe that chiropractic adjustments or simple stretches are the silver bullet for pain relief and posture correction. While these practices are beneficial when applied correctly, a common misconception is that more adjustments or aggressive interventions always lead to better results. In reality, this overlooks the nuanced nature of our musculoskeletal system, where small but precise changes can have outsized impacts. For example, many practitioners focus solely on spinal alignment without considering how habitual movement patterns or muscular imbalances negate those adjustments over time. This can lead to a cycle where adjustments are performed without addressing the root cause, making the improvements temporary at best.
Why does focusing only on the spine sometimes backfire for long-term mobility?
When chiropractors or individuals neglect the role of surrounding soft tissues and mobility, they may overlook that joint stiffness often results from compensatory movement patterns or restricted muscles. Recent studies, such as the one published in the Journal of Bodywork and Movement Therapies, highlight that joint health is a product of both proper alignment and optimal mobility. Without integrating mobility exercises—like targeted stretches or neuromuscular re-education—the spine may be temporarily in the right position, but the underlying issues persist, leading to recurring discomfort. Therefore, a holistic approach that combines adjustments with mobility work produces sustainable improvements rather than quick fixes. This strategy exemplifies why understanding the interplay between alignment and mobility makes all the difference.
Common myths that hinder progress—what you need to watch out for
One prevalent myth is that cracking your back or neck provides instant relief, which can tempt individuals to self-manipulate. This soul-limited approach often ignores that true healing requires addressing underlying muscular imbalances, postural habits, and movement compensation. Over time, habitual self-manipulation may even cause joint laxity or instability, especially if performed improperly. Furthermore, many assume that passive treatments like adjustments alone will fix chronic issues, but evidence suggests that active participation through mobility exercises is critical for lasting change. For instance, incorporating mobility routines, such as those outlined in this resource, significantly amplifies the benefits of chiropractic care. Having a comprehensive plan that combines adjustments with active mobility addresses both structural and functional aspects, paving the way for genuine improvement.
Maintaining Lasting Results with the Right Tools
To keep your posture and mobility improvements working long-term, leveraging the right equipment and methodologies is essential. I personally rely on a combination of quality mobility aids, ergonomic gear, and digital resources that streamline my self-care routines. One tool I can’t live without is the foam roller. My favorite model is the TriggerPoint GRID, which mimics my therapist’s myofascial release techniques. It helps me target tense muscles, especially around my hips and lower back, maintaining flexibility after adjustments. Using it consistently—about 10 minutes daily—enhances circulation and prevents stiffness that can undo recent chiropractic work.
Another indispensable piece of gear is a lumbar support cushion. I’ve found that my posture in the car or at my desk improves significantly when I sit with a tailored lumbar lordosis. I prefer the Everlasting Comfort Memory Foam Seat Cushion because its contouring aligns my pelvis properly, reducing strain on my lower back and hips. Incorporating this into my daily routines helps reinforce the correct positioning and minimizes the risk of slipping back into poor habits over time.
On the software front, I recommend using mobility tracking apps like PhysiApp or the simplicity of a dedicated journal. Tracking daily mobility exercises, adjustments, and symptom changes helps me identify patterns and areas that need more focus. These digital tools serve as a reminder system, ensuring I don’t neglect my routines and enabling me to celebrate incremental progress.
Looking ahead, I predict that wearable technology integrating biofeedback will become mainstream. Devices that monitor posture cues in real-time could automatically alert you when you’re slouching or when your muscles tense unnecessarily. This evolution would empower users to correct habits instantly, greatly enhancing the sustainability of improvements achieved through chiropractic and mobility work.
How do I maintain my progress over time?
The key to lasting benefits is consistency. I set aside 10 minutes each morning for targeted mobility routines using resistance bands and my foam roller, which can be easily adapted from this guide. Combining these with ergonomic adjustments at work and regular chiropractic check-ins, I maintain alignment and flexibility. Incorporating a variety of tools keeps my routine engaging and effective, preventing stagnation. If you’re ready to elevate your approach, I recommend trying out one of these tools consistently for at least a month—noticeable improvement will follow. For personalized guidance, don’t hesitate to reach out through our contact page, and let’s get your mobility and posture on track.
The Hardest Lesson I Learned About Chiropractic, Posture, Mobility, and Adjustments
The biggest eye-opener was realizing that my approach to seat fitting was entirely off. I used to think that tweaking my saddle until it felt okay was enough—turns out, real comfort demands a more nuanced understanding of my unique body mechanics and how small adjustments can dramatically improve my riding experience.
A Few Surprising Truths About Mobility and Posture That Changed My Journey
One game-changing insight was discovering that habitual movement patterns often sabotage even the best initial adjustments. No matter how perfect my saddle position was, tight hips and neglected mobility routines would gradually undo the progress. Incorporating targeted mobility routines, like those outlined in this guide, helped me sustain my improvements for the long haul, proving that active maintenance is essential.
What I Wish I Had Known Sooner About Long-Term Expert Strategies
I used to believe that one good adjustment would last forever—how wrong I was. Consistency and attention to detail in mobility exercises, coupled with quality tools like foam rollers and ergonomic supports, are what truly lock in the gains. For example, using the comprehensive resources on posture and mobility has become my go-to roadmap for enduring health.
Curated Tools That Became My Posture Allies
Over the years, I’ve come to rely on a few key tools. The TriggerPoint GRID foam roller, which I often recommend based on personal success, enables me to release muscle tension in my hips and pelvis—crucial for maintaining optimal saddle positioning. Pairing this with an ergonomic lumbar cushion like the Everlasting Comfort Memory Foam Seat Cushion has transformed my sitting comfort during long rides and desk hours alike. Finally, apps like PhysiApp help me keep track of my mobility routines, turning maintenance into a daily habit rather than an afterthought.
Your Next Step Toward Pain-Free Pedaling
Remember, the journey to preventing hip numbness and optimizing your cycling comfort is uniquely yours. Embrace the process of precise adjustments, integrated mobility routines, and reliable tools. Whether you’re a weekend rider or a daily commuter, these personalized strategies can help you surpass discomfort and enjoy longer, more pleasurable rides. So go ahead—start today, fine-tune your setup, and see how much smoother your cycling becomes. What’s one small adjustment you’re willing to try first? Share below and let’s support each other’s progress.