
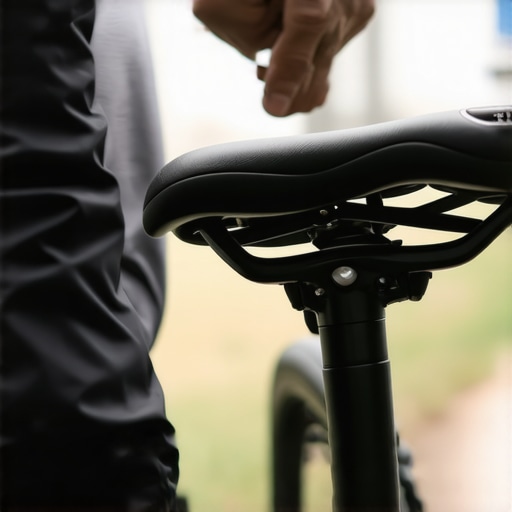
It was mile fifteen of a “relaxing” Saturday ride when it happened—that sharp, electric twinge right above my beltline. I tried to stand up to stretch, but my lower back felt like it had been clamped in a vise. I had spent a small fortune on a sleek new road bike, but I felt like I was riding a medieval torture device. For years, I assumed I just wasn’t “built” for long rides, or that my age was finally catching up to me. I even tried those massive, gel-filled saddles that look like a sofa cushion, thinking more padding was the answer. It wasn’t. In fact, that was my biggest mistake: thinking that comfort came from softness rather than geometry. The reality was that my seat was about two centimeters too low, forcing my pelvis to tilt posteriorly and putting a constant, grinding strain on my L4 and L5 vertebrae. Once I learned how to actually dial in my setup, the pain didn’t just fade—it vanished. Today, we are going to fix your ride so you can actually enjoy the scenery instead of counting the minutes until you can get off the saddle.
The Real Reason Your Lower Back Screams on Every Climb
Most of us treat our bike seats like office chairs, but your body isn’t just sitting; it is a complex machine of levers and pulleys. When your saddle height is off, your legs can’t fully extend, which forces your lower back to do the work your glutes should be handling. This often leads to a situation where stretching your hamstrings might actually make your back pain worse if the root cause is a pelvic misalignment during the pedal stroke. I used to think I could just “tough it out,” but repetitive strain is a patient enemy. If you are constantly rocking your hips to reach the bottom of the pedal stroke, you are essentially asking your spine to act as a shock absorber for every bump in the road. You need to focus on the hip hinge fix to keep your spine neutral while you power through your quads. [image_placeholder_1]
Is a tiny adjustment actually worth the effort?
You might be skeptical that a few millimeters can be the difference between a personal best and a week on the heating pad. But the math doesn’t lie. According to a study published in the Journal of Science and Medicine in Sport, nearly 58% of non-professional cyclists report lower back pain, with a significant portion of those cases linked directly to improper saddle height and poor bike fit. This isn’t just about “feeling good”; it is about preventing long-term disc compression. When you understand the link between mobility and posture, you realize that your bike setup is essentially a daily chiropractic decision. Have you ever finished a ride and felt like you aged twenty years in two hours? I want to hear about it—drop a comment and let me know if it’s your lower back or your neck that usually gives out first. We are going to walk through the “Heel-to-Pedal” method and the 109% rule to make sure your spine stays happy while your legs do the heavy lifting.
Master the Heel-to-Pedal Method first
The simplest way to stop the rocking motion that grinds your lower back into the dust is the heel-to-pedal method. Put on your riding shoes, hop on the bike while leaning against a wall for balance, and place your heel directly on the pedal. At the very bottom of the stroke, your leg should be completely straight without you having to tilt your pelvis to reach the pedal. If your knee stays bent, you are too low. If your heel loses contact or you feel your hip dip to reach it, you are too high. I remember a grueling ride through the Loess Hills where I felt like my lower back was a guitar string about to snap; I pulled over, dropped my seat by a measly 4 millimeters, and the relief was instantaneous. It felt like I’d finally stopped fighting my own machine. This simple tweak is one of the most effective mobility hacks for a more active life because it protects your joints before the fatigue sets in.
Why your knee angle dictates your spinal health
When you transition from your heel to the ball of your foot, which is your actual riding position, that straight-leg measurement naturally creates a 25 to 35-degree bend in the knee. This is the anatomical sweet spot. If the angle is too sharp, you lose leverage and put immense pressure on the patella. If it is too shallow, your hamstrings overextend, pulling on your sit-bones and flattening your lumbar curve. This is often the real reason your hamstrings stay tight despite stretching—they aren’t actually short, they are being over-tensioned by a saddle that is sitting too high. Think of your pelvis like a bowl of water. If you have to reach too far for the pedals, you are splashing water out of the sides with every rotation, which is essentially what happens when your spine loses its stable base and starts swaying.
Apply the 109 percent rule for a precision fit
If you want to move beyond eye-balling it, the 109% rule is the gold standard for cyclists who are serious about long-term spinal health. Measure your true inseam from the floor to your crotch in millimeters, then multiply that number by 1.09. The result is the exact distance from the top of your saddle to the center of your pedal axle when the crank arm is at the very bottom. This mathematical approach ensures your chiropractic health and mobility aren’t compromised by guesswork. When I first applied this, I realized my seat was a full inch off. Correcting it meant I could finally maintain a neutral spine even when I was exhausted. This prevents the moment why your posture collapses when you get tired during the final five miles of a long ride.
Stop the hip-swing with a two-minute drill
Once your height is set, you need to check for hip stability. Have a friend watch you from behind as you pedal. If they see your hips dipping left and right like a pendulum, you are still too high and putting your discs at risk. This repetitive swaying is what causes those hot spots of pain next to the tailbone. To fix this, you can perform a 2-minute drill for better spinal rotation off the bike to ensure your mid-back isn’t locked up. If your thoracic spine is stiff, your lower back will be forced to compensate for the bike’s rigidity even more. Remember, a bike fit isn’t a set it and forget it event; as your flexibility improves, your optimal position might shift slightly to accommodate your new range of motion.
We have dialed in the seat height, but there is a nuance most people miss: mobility is not a static achievement you reach and then forget. One of the biggest myths I see in the cycling community is the idea that a more upright, ‘straight’ back is always better for pain management. Everyone says to sit up taller to save your spine, but in my experience, forcing an unnaturally vertical position often leads to more trouble. When you try to sit perfectly upright on a frame designed for a lean, you actually end up compressing your vertebrae because you have lost the natural suspension provided by your core and hips. This is exactly why your perfect posture is actually causing muscle fatigue—you are fighting the bike’s geometry rather than working with it.
Does your core strength actually matter if the reach is too long?
You can have the strongest abs in the world, but if your ‘reach’—the distance from your saddle to your handlebars—is too long, your lower back will eventually pay the price. If you find yourself constantly ‘scooting’ forward on the saddle, your reach is likely the culprit. This forces the pelvis into an anterior tilt, which creates a shearing force on the lower discs. I have seen riders spend thousands on lightweight carbon parts while ignoring the link between mobility and posture. A 2016 study in the Journal of Physical Therapy Science suggests that excessive lumbar flexion on a bike isn’t just a comfort issue—it actually alters the activation patterns of the multifidus muscles, leading to chronic instability long after you have finished your ride. Have you ever fallen into this trap of trying to sit too upright or stretching too far? Let me know in the comments.
There is also a dangerous ‘trap’ I call the ‘Locked-Elbow Lean.’ When riders get tired, they often lock their elbows to support their upper body weight. This is a massive ‘oops’ factor because it turns your arms into rigid struts that send every vibration from the road directly into your neck and mid-back. Instead of the bike absorbing the shock, your spine does. If you are struggling with this, looking into how chiropractic adjustments enhance posture and mobility can help reset those neural pathways that keep you in a state of high-tension guarding. You might also be tempted to use a back support, but remember that why most posture braces actually make your back weaker is because they allow your stabilizing muscles to ‘turn off’ and atrophy.
Don’t let your elbows become shock absorbers
To truly fix your ride, you need to integrate mobility boosts for posture into your off-bike routine. This ensures that when you are in the saddle, your body has the functional range to maintain a slight bend in the elbows and a neutral ‘flat’ back without straining. I used to think I just needed a softer seat, but what I actually needed was a shorter stem and better thoracic extension. Once you stop treating your bike like a stationary chair and start treating it like a dynamic extension of your own skeleton, the ‘unsolvable’ back pain usually solves itself. Take two minutes after your next ride to check your elbow bend and hip angle—your future self will thank you for the extra effort.
I used to think that once I found my ‘magic’ saddle height, the work was done. I was wrong. Your body is not a static piece of furniture; it is a dynamic system that shifts based on your stress levels, hydration, and even the time of day. To truly lock in these gains, you need to stop guessing and start measuring. I personally swear by using a digital goniometer or a dedicated bike-fit app like VelogicFit. These tools allow you to measure your knee angle in real-time while you are actually pedaling, rather than just standing still. This is crucial because your biomechanics change under load. If you are serious about your longevity, you need to understand that the ultimate guide to improving mobility and posture in 2025 involves merging technology with physical awareness.
Stop guessing and use a digital inclinometer
Beyond the seat post, the angle of your saddle itself—the tilt—can make or break your lumbar health. I use a digital inclinometer to ensure my saddle is within 0.5 degrees of level (or slightly nose-down depending on the discipline). Even a tiny upward tilt can force your lower back into a compensatory arch that shuts down your core. Phil Burt, the renowned cycling ergonomics expert and author of Bike Fit, emphasizes that the body is a ‘moving target.’ He argues that as we age or face injuries, our ‘micro-adjustments’ must reflect our current functional range. This is why I recommend you how to test your own spinal rotation at home every few months. If your rotation is limited, your bike setup needs to compensate until your mobility returns, otherwise, you are just forcing a square peg into a round hole.
How can I keep my spine happy on the bike forever?
Consistency is the only real ‘secret’ here. I have a three-step routine I perform every Sunday: I check my bolt torques (because saddles do slip), I spend ten minutes on improving posture through mobility with a focus on hip internal rotation, and I record a thirty-second video of myself on the trainer from the side. This visual feedback is a game-changer. It helps you spot if you are beginning to ‘slump’ as you fatigue. Over time, these small habits ensure that chiropractic adjustments unlock a pain-free lifestyle today and stay effective long-term. If you don’t maintain the machine, the adjustments won’t ‘stick’ because the bike will just pull you back into old, painful patterns.
The future of cycling ergonomics is wearable
We are moving toward a world where ‘live’ biomechanical feedback will be standard. I am already seeing the rise of wearable sensors that vibrate when your pelvis starts to rock or when your spine loses its neutral alignment. This real-time coaching will eventually replace the once-a-year professional bike fit. In the meantime, you have to be your own mechanic. Use the 109% rule we discussed, but don’t be afraid to tweak it by a few millimeters based on how your back feels after a long climb. I want you to try this: next time you feel that familiar lower-back ‘twinge,’ pull over and drop your saddle by just 3 millimeters. I bet you’ll find that mobility boosts for posture aren’t just about stretches—they are about removing the mechanical obstacles that are holding you back.
The Brutal Truths I Learned While Chasing a Pain-Free Ride
After thousands of miles and dozens of adjustments, I realized that most of what we are told about cycling comfort is actually backward. Here are the three ‘lightbulb moments’ that finally allowed me to ride a century without a single ounce of lumbar tightness:
- Symmetry is a functional myth: Most of us have one leg slightly longer or a hip that rotates differently. I spent months trying to force a ‘perfectly symmetrical’ fit, only to realize that my body needed a slight offset to feel neutral. Listen to your unique anatomy over the textbook diagrams.
- Softness is your worst enemy: Those massive, gel-filled sofa saddles actually cut off blood flow and cause more numbness because they allow your sit-bones to sink in, putting pressure on soft tissue. A firm, properly shaped saddle is always superior for long-term health.
- The ‘Small Change’ rule: Never adjust more than 2-3 millimeters at a time. Your body needs several short rides to recalibrate its neural pathways to a new position. If you overhaul everything at once, you won’t know which change actually fixed the problem.
Integrating these lessons with mobility boosts for posture ensures that your off-bike habits support your on-bike performance.
The Gear That Rescued My Spine
You don’t need a professional mechanic to fix your ride, but you do need the right tools to stop the guesswork. These are the resources I personally trust to keep my geometry dialed in:
- Phil Burt’s ‘Bike Fit’: This book is the gold standard. It explains the medical science behind why we hurt in the saddle and provides a roadmap for DIY adjustments that actually work.
- Digital Inclinometer: I use a simple Park Tool digital level to ensure my saddle tilt is precise to within half a degree. As we discussed, even a tiny tilt can wreck your pelvic stability.
- A Dedicated Foam Roller: But remember, the truth about foam rolling your lower back is that you should focus on your glutes and quads instead to release the tension pulling on your spine.
By using these tools, you are essentially applying improving posture through mobility strategies directly to your equipment. [image_placeholder_2]
Reclaiming the Joy of the Open Road
Cycling should be an escape, not a chore. When you take the time to dial in your geometry, you aren’t just adjusting a machine; you are respecting your body’s limits and potential. Forgetting the pain and focusing on the rhythm of the road is only possible when your spine isn’t screaming for a break every ten miles. Remember that why chiropractic care is your secret weapon for better posture often comes down to keeping your joints moving as they should so they don’t lock up during a long climb. Don’t be afraid to experiment with these tweaks—your best ride is still ahead of you. Have you ever tried a professional bike fit, or are you a DIY-er like me? Let me know in the comments below if you found a specific ‘magic’ adjustment that worked for you.